Video case studies are an effective way to showcase real customer experiences and build trust with your audience. They combine emotional storytelling with measurable results to demonstrate how your product solves problems. Here's how to create one step-by-step:
- Choose the right customer story: Focus on relatable challenges and measurable outcomes like ROI or time saved.
- Plan your video: Use a clear structure - Problem, Solution, Results - and set specific goals (e.g., conversions or lead generation).
- Film with quality equipment: Prioritize good audio, clear visuals, and dynamic shots to keep viewers engaged.
- Edit for impact: Add captions, visuals, and a strong call-to-action (CTA) to guide viewers toward the next step.
- Optimize for platforms: Tailor video formats (e.g., vertical for TikTok, horizontal for YouTube) and embed them on your Shopify store for maximum visibility.
Key stats to remember:
- 89% of people say watching a video influenced their purchase decision.
- Viewers retain 95% of a video’s message compared to 10% from text.
Start small: Interview one customer, follow this checklist, and refine your approach based on results.
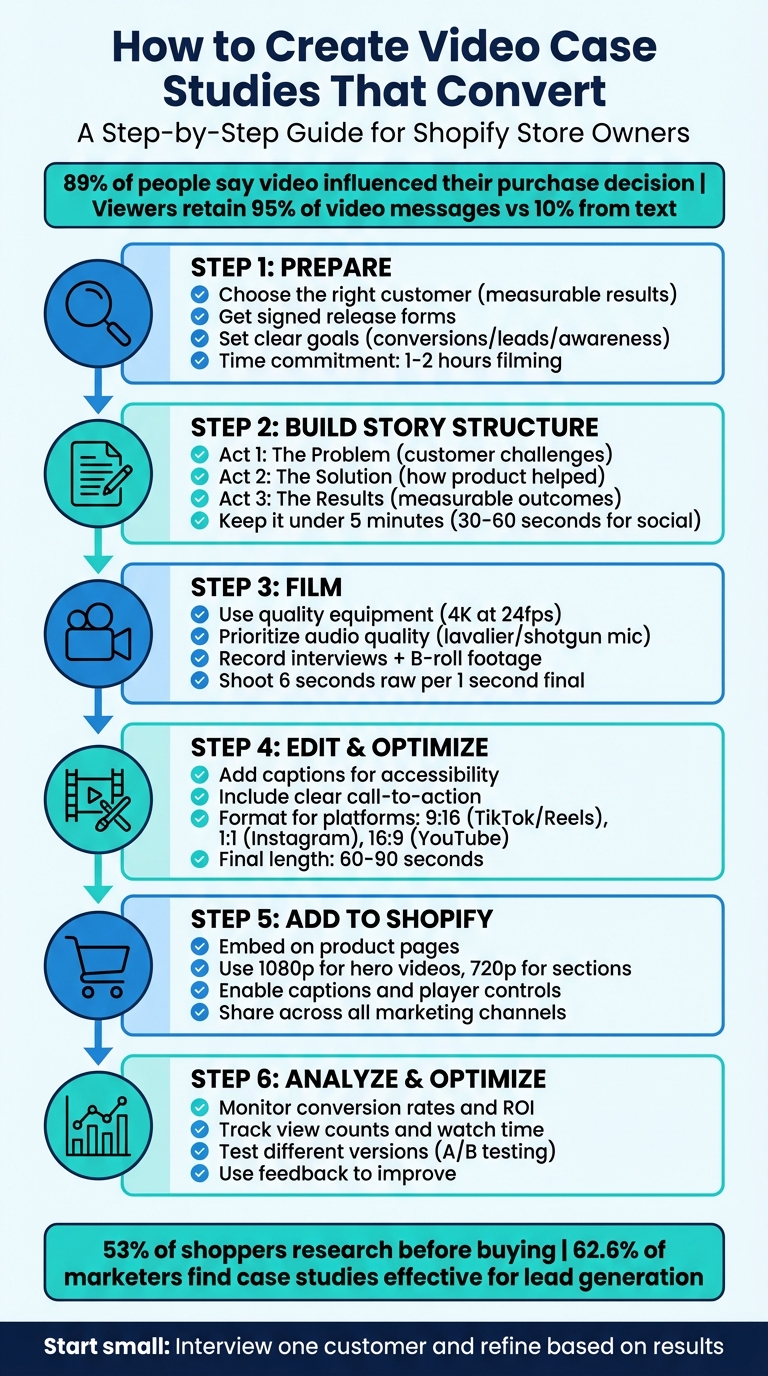
6-Step Video Case Study Creation Process for Shopify Stores
Step 1: Prepare for Your Video Case Study
Choose the Right Customer Story
Start by identifying a customer whose experience aligns with the challenges your audience faces. It’s not just about picking a satisfied customer - it’s about finding someone whose journey reflects the problems your potential customers are looking to solve. Ideally, this customer shares similar demographics, industries, or pain points with your target audience.
Focus on customers who can provide measurable results. Look for specifics like ROI, time saved, or growth percentages. Why does this matter? Because 53% of shoppers research before buying to ensure they’re making the best choice, and two-thirds of people are more likely to buy after watching a testimonial that shows how a product helped someone like them. Hard numbers can make your case study far more convincing.
Choose power users who are comfortable on camera and can clearly articulate how your product fits into their daily routine. If data isn’t available, highlight their genuine emotional response and how your product has improved their life. Paul Gale, Managing Director at Silicon Pixel, emphasizes:
"The best case studies happen when someone speaks from the heart."
Before committing to a full shoot, conduct a short interview to ensure their story follows a clear Problem-Solution-Result structure. To encourage participation, consider offering perks like covering travel costs, discount codes, or even raw footage they can use for their own marketing.
Once you’ve found the right customer, the next step is securing permissions and gathering testimonials.
Get Permission and Testimonials
Before filming, make sure to get signed release forms and any necessary property permissions. Check local regulations to see if permits are required for your video equipment.
Gather measurable results ahead of time. Filming a professional interview and capturing B-roll typically takes 1 to 2 hours, so be upfront about the time commitment to build trust with your customer.
During pre-interviews, use open-ended questions based on the "Problem-Solution-Results" framework. This approach helps your customer share a complete and relatable story in their own words. Paul Gale advises against over-preparing them:
"We will say these are the areas of the questions we will ask you... The issue there is if you give every question in advance you'll end up with something very inauthentic."
Transcribe these early conversations to pinpoint passionate soundbites that can serve as focal points in your final video.
Set Clear Goals
With your customer selected and permissions in place, it’s time to define specific objectives for your video. Are you aiming for conversions, raising awareness, or generating leads? Your goals should guide both your customer selection and the story you craft.
Stick to the Problem-Solution-Results format to sharpen your focus. Ask yourself: "What makes my product stand out?" and "What problem does this video solve for my audience?" Considering that 62.6% of marketers find client case studies effective for generating leads, your goals should go beyond immediate sales to include building brand awareness and fostering long-term engagement.
Think about where your video will live. A 3-5 minute video works well for high-intent website visitors, while shorter clips (20-30 seconds) are ideal for social media campaigns. Kyle Weber, Former Associate Creative Director at Superside, sums it up perfectly:
"Ultimately your video case study exists to get results: either in the form of new customers or an increase in sales."
Plan to track key engagement metrics like click-through rates, bounce rates, and time spent on your site to evaluate the video’s success.
Step 2: Build Your Story Structure
Create a Story Outline
When structuring your video, break it into three essential phases: Problem, Solution, and Results. This approach not only keeps your story organized but also ensures it resonates with your audience.
- Act 1: The Problem: Introduce your customer as the protagonist and highlight their specific challenges. Use real pain points to set the stage and build relatability.
- Act 2: The Solution: Shift focus to how your product addressed their problem. Rather than listing features, emphasize how it made their life easier or solved their issue. People care about benefits, not just technical details.
- Act 3: The Results: Wrap up with measurable outcomes. Showcase data, long-term improvements, or other metrics that demonstrate the value of the product. This is where you prove the investment was worth it.
This structure keeps viewers engaged and helps them connect with the narrative on a personal level.
| Phase | Key Elements to Include | Purpose |
|---|---|---|
| The Problem | Customer background, specific obstacles, emotional pain points | Establishes relatability and context |
| The Solution | Product implementation, key features used, "Aha!" moments | Shows how the product solves real problems |
| The Results | Quantifiable metrics, long-term impact, customer satisfaction | Provides proof and builds trust |
Start strong with a hook - grab attention right away by addressing a common need or sparking curiosity. Those first few seconds are critical, especially since 89% of people say watching a video has influenced their decision to buy.
Once your outline is complete, move on to crafting a script that feels natural and authentic.
Write a Script
Using your outline as a foundation, write a script that feels conversational and approachable. Share key topics with your interviewee in advance so they can prepare, but encourage them to speak in their own words during filming. This keeps the dialogue genuine and avoids the stiffness of overly rehearsed lines.
When writing, focus on how the script sounds when spoken aloud. Use a direct and friendly tone that speaks to the audience, not at them. Wherever possible, incorporate clear, on-screen metrics to emphasize the results and outcomes you’re highlighting.
Keep it brief. For in-depth case studies, aim for under five minutes, while social media clips should stay between 30 and 60 seconds. Research shows that 73% of consumers prefer short videos when researching products or services. Respect your audience’s time by delivering concise yet impactful content.
Plan Your Visuals
Your visuals should enhance and align with the story you’re telling. Plan a shot list that includes interviews, B-roll footage, and graphics to bring your narrative to life. Each visual should directly support what’s being said in the script. For instance, if your customer mentions saving time with your product, show them actively using it to manage tasks. This kind of alignment strengthens the message and ensures it sticks with viewers.
Mix up your visuals to maintain interest. Use a variety of shots - interviews, contextual scenes, and close-ups - to keep things dynamic and engaging. This not only helps sustain viewer attention but also builds trust by showing real-world use of your product.
Case Study Video Strategy (Step-by-Step for Businesses)
Step 3: Film the Video
Now that you’ve got your story mapped out and your script ready, it’s time to focus on capturing high-quality footage that brings your vision to life.
Use Quality Equipment
Audio is king. Viewers are far less forgiving of poor sound than blurry visuals. Bad audio can make your speaker - and the information they’re sharing - feel unreliable. To avoid this, use a dedicated microphone like a lavalier or shotgun mic instead of the default one built into your camera.
When it comes to video, aim to shoot in 4K resolution at 24 frames per second. This ensures your footage looks crisp on modern screens. You don’t need a pricey cinema camera; a smartphone shooting in 4K works perfectly for social media, while a DSLR or mirrorless camera offers more professional options for website content. To eliminate shaky footage, always use a tripod or stabilizer.
Lighting is just as important as your camera setup. Use a primary light to illuminate your subject and a secondary light to add depth to the background. If you’re filming outdoors, position yourself near large windows for natural light, but stay mindful of shifting shadows.
| Equipment Type | Recommended Options | Best Use Case |
|---|---|---|
| Microphone | Lavalier (Lapel) | Interviews and talking head shots |
| Microphone | Shotgun / Directional | Capturing audio from a distance |
| Camera | Smartphone (4K) | Affordable, high-quality mobile content |
| Camera | DSLR / Mirrorless | Professional depth and lens flexibility |
| Lighting | Three-Point Rig | Studio-quality setup with depth |
| Lighting | Ring Light | Simple and even lighting for close-ups |
Before hitting record, triple-check the focus, white balance, and exposure to ensure everything looks polished.
Record Interviews and Supporting Footage
Plan for 1–2 hours per interview to allow enough time for a relaxed conversation and to capture extra B-roll footage. Use open-ended questions that encourage storytelling instead of simple yes-or-no answers. Ask your subject to respond in full sentences so you can edit out the interviewer’s voice later. For instance, instead of just saying "Yes", they might say, "The biggest hurdle we faced was managing inventory during the holiday rush."
"The best case studies happen when someone speaks from the heart." - Paul Gale, Managing Director, Silicon Pixel
For supporting footage, focus on visuals that directly reinforce what’s being said. Follow the "See Dog, Say Dog" rule - if the speaker mentions saving time, show them actively using your product to streamline tasks.
To keep the video engaging, film from multiple angles and use a variety of shot sizes. Don’t forget to record "buffers" - three seconds of silence at the start and end of each shot. These will make transitions smoother during editing. After filming, back up everything immediately using a computer and external hard drive to avoid losing any footage.
Once you’ve gathered all your content, you’ll be ready to shape it into a concise and compelling narrative.
Keep Videos Short
Aim to keep your final video between 60–90 seconds. For platforms like Instagram or TikTok, create even shorter versions - 20 to 30 seconds works best. Edit out anything unnecessary to focus on the most impactful moments of your customer’s story.
Don’t be surprised if you shoot way more footage than you’ll use. It’s common to capture around 6 seconds of raw material for every 1 second that makes it into the final cut. This gives you plenty of options to find the most powerful soundbites and visuals during editing.
sbb-itb-d9e5b3a
Step 4: Edit and Optimize
Turn your raw footage into a story that guides your audience through the journey from problem to solution. Start by importing and organizing your clips with a consistent naming system to keep everything manageable. Once organized, focus on editing to create a video that's both engaging and easy to follow.
Add Captions and Text
Captions are a must-have. Many social media users watch videos without sound, so subtitles ensure your message reaches everyone, no matter how they’re viewing it. They also make your content accessible to viewers who are hearing-impaired, giving you the chance to connect with a broader audience.
Use lower thirds - those text overlays at the bottom of the screen - to introduce speakers by name and title. This simple addition builds instant credibility. If your video includes data, bring it to life with animated graphics or on-screen charts. For instance, if a customer shares how their sales skyrocketed, display those numbers visually. Reinforce the Problem-Solution-Results structure by pairing metrics with captions to drive the story home.
"People connect faster with visuals than with text." – Richard Davis, ThinkSpark
Keep your branding consistent. Incorporate your company’s colors, fonts, and logos in text overlays, as well as intro and outro screens. To make key moments stand out, consider adding subtle sound effects. These small details give your video a polished, professional look that inspires trust.
Include a Call-to-Action
Wrap up your video with a clear call-to-action (CTA). Whether it’s “Visit our store to see these results” or “Request a demo today,” the CTA should guide viewers toward the next step. Pair your CTA with an end screen featuring your logo, website URL, and a specific prompt. This ties back to the goals you set in Step 1, whether that’s driving traffic, collecting sign-ups, or generating leads.
Keep it simple and direct. After watching how someone solved a problem similar to theirs, viewers are ready to act - but they need you to point them in the right direction. Make sure the final video format integrates seamlessly with your Shopify store.
Format for Different Platforms
Export your video in formats tailored to each platform. MP4 is a safe bet, as it’s compatible with nearly every platform.
| Platform | Orientation | Aspect Ratio | Best For |
|---|---|---|---|
| TikTok / Instagram Reels | Vertical | 9:16 | Mobile-first short-form content |
| Instagram Feed | Square | 1:1 | Traditional social grid posts |
| YouTube / Facebook / Twitter | Horizontal | 16:9 | Desktop viewing and longer content |
For YouTube and your website, create a 60–90 second version. Then, trim it down to 20–30 seconds for platforms like TikTok and Instagram Reels. Each platform has its own style and audience habits, so adjust your video accordingly. On YouTube, optimize your video title, description, and tags with target keywords to boost search visibility.
When embedding videos on your Shopify store, use responsive embedding tools to ensure they look great on any device, from mobile phones to desktop computers. This ensures a smooth viewing experience, whether someone’s catching your video during a quick lunch break or browsing at their desk.
Step 5: Add the Video to Your Shopify Store
Show off your finished video where it matters most - right in front of your audience. A well-placed video can turn your case study into a powerful tool that earns trust and encourages action.
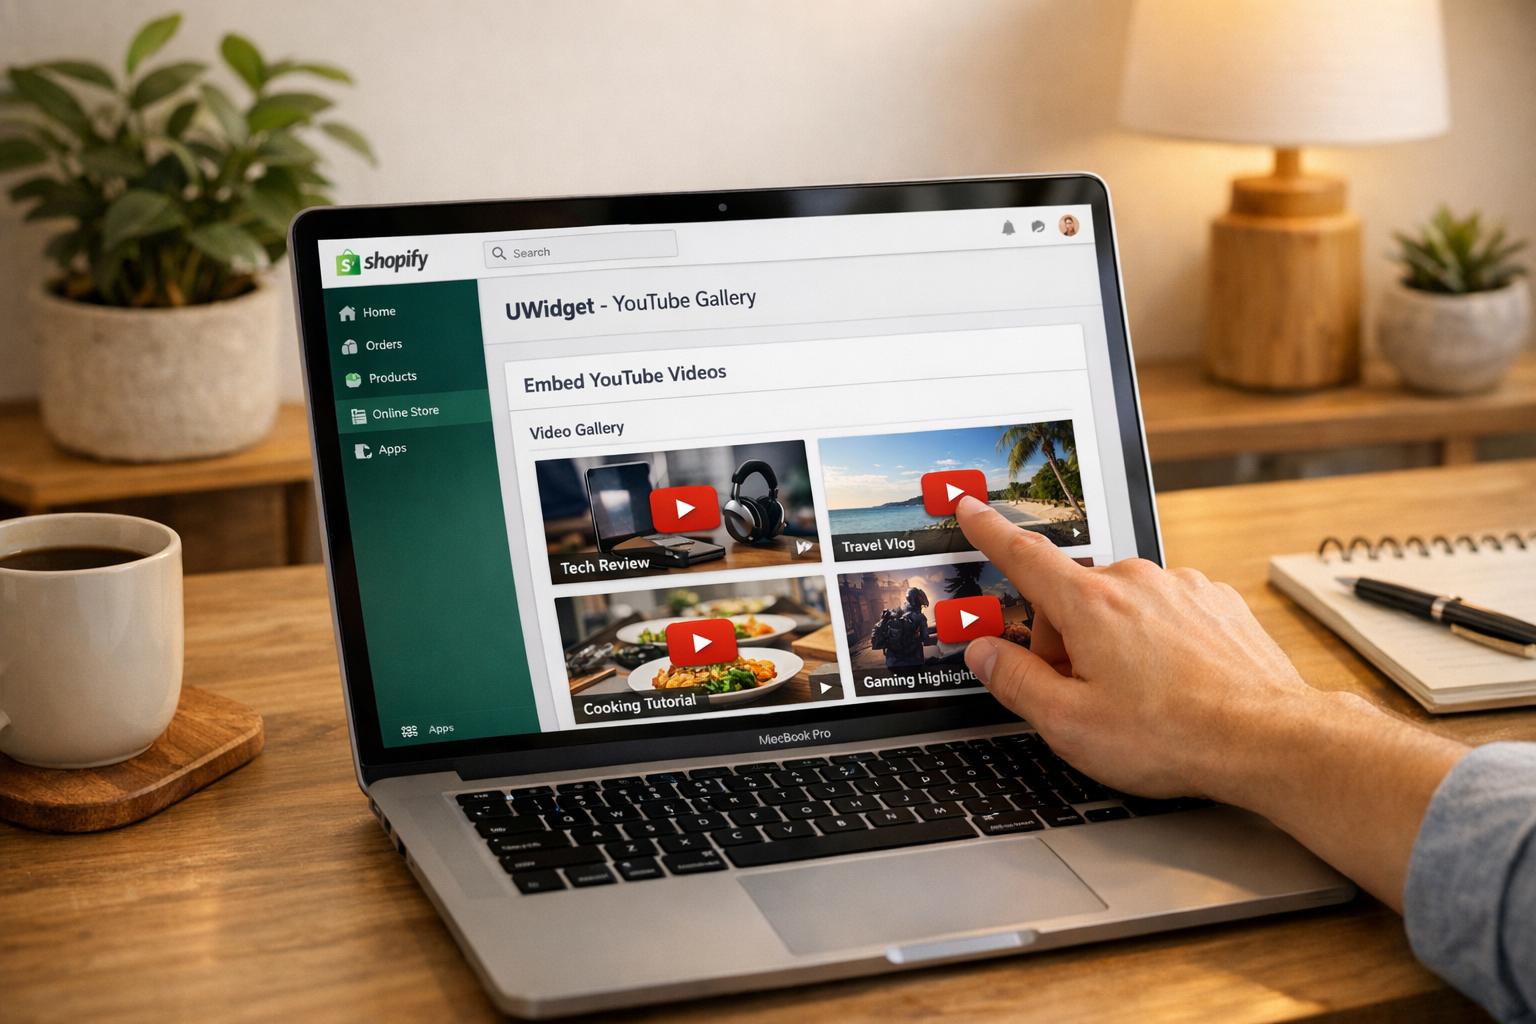
Embed Videos with UWidget
Using UWidget makes adding YouTube videos to your Shopify store a breeze. You can display your case studies as galleries, carousels, or widgets to enhance your store's visual appeal. Hosting videos on YouTube is a smart move - it improves SEO, manages bandwidth, and boosts your chances of appearing in Google search results. While directly uploading videos might offer a cleaner look without third-party branding, embedding from YouTube generally improves discoverability.
For the best results, use 1080p resolution for full-width hero videos and 720p resolution for smaller sections. Always enable player controls and captions to ensure your content is accessible and clear, even on mobile devices.
Once ready, position these videos strategically on your product and case study pages to maximize their effectiveness.
Place Videos on Product and Case Study Pages
Your video should answer key questions like, "What does this look like in real life?" and "How does it solve my problem?" On product pages, consider placing your case study video near the product description or image gallery. For example, a video showcasing your product in action can help reduce hesitation and give potential buyers the confidence to make a purchase.
For dedicated success story pages, mix shorter 30-second testimonials with longer, in-depth reviews - around seven minutes - for a well-rounded approach. This combination builds trust and provides the social proof needed for higher-priced items.
But don’t stop there - extend your video’s reach by sharing it across all your marketing platforms.
Share Across Marketing Channels
Don’t let your video sit idle on your site. Share it widely across social media, email campaigns, and even your homepage to maximize its impact. Video marketing has been shown to boost sales .
When uploading to YouTube, make sure to include target keywords in the video’s title, description, and tags to improve its visibility. For email campaigns, embedding a thumbnail with a play button can grab attention and provide a quick, engaging overview of your product.
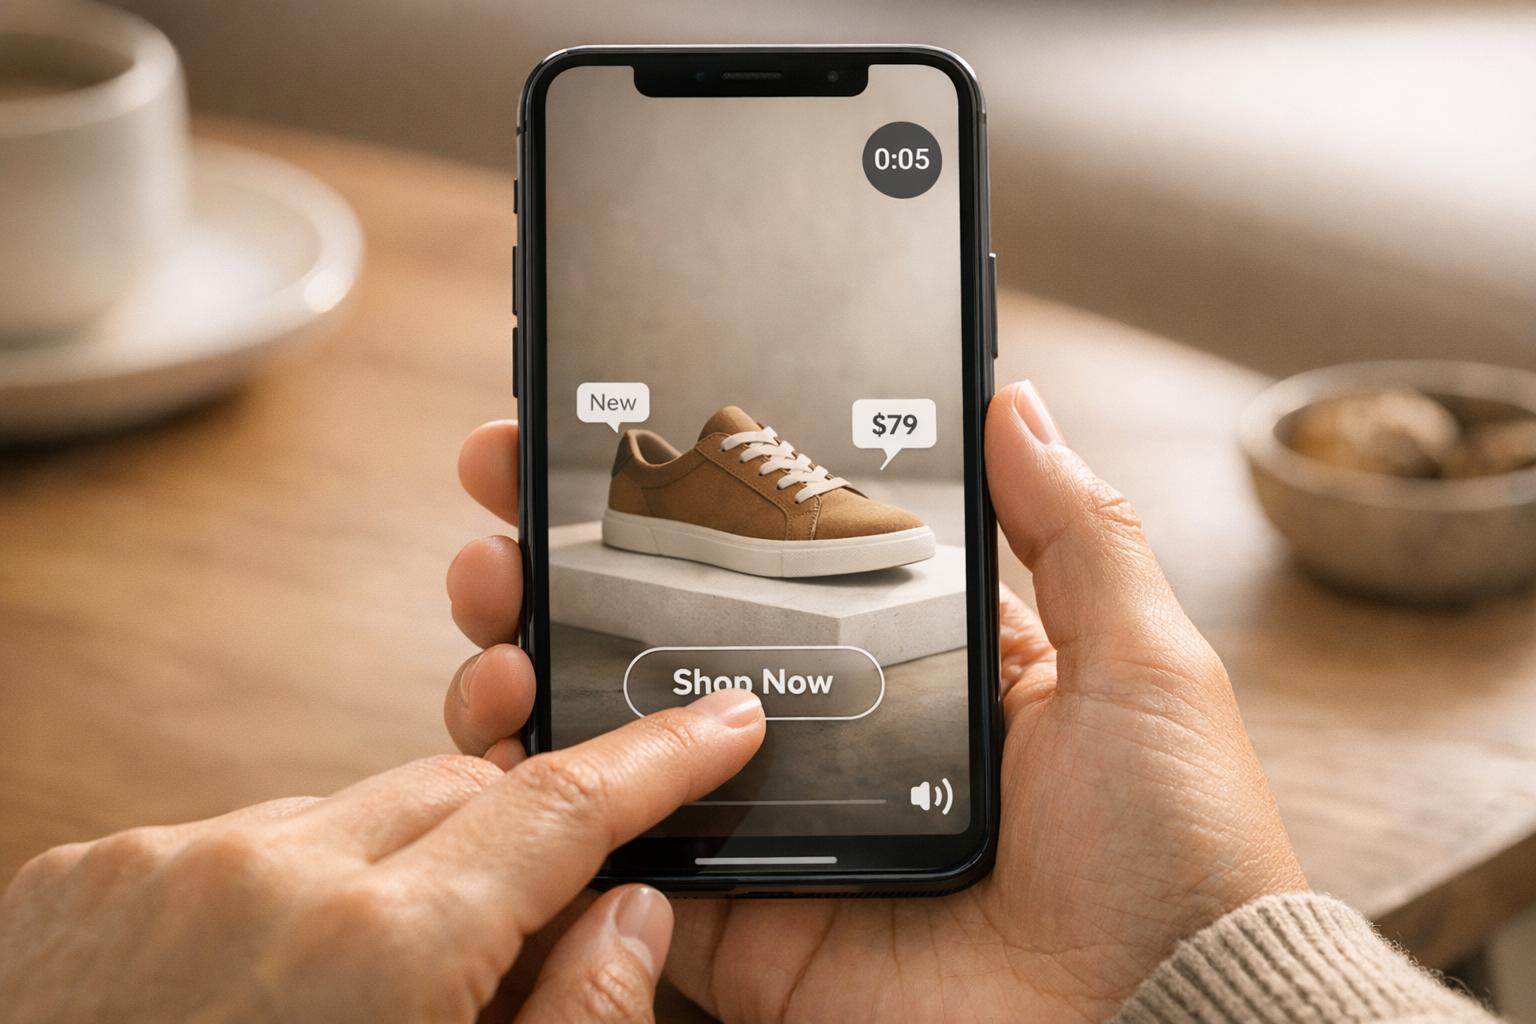
Tailor the video format to fit each platform: use vertical videos for Instagram Reels and TikTok, square videos for Instagram Feed, and horizontal videos for Facebook and YouTube. Always end your video with a clear call-to-action like “Shop Now” or “Learn More” to guide viewers toward the next step.
Step 6: Analyze Results and Optimize
Once your video is live, the real work begins - evaluating its performance and fine-tuning your approach. Just like any good case study, using data to guide your adjustments ensures your video keeps building trust and driving conversions.
Monitor Key Metrics
Keep an eye on critical numbers like conversion rates, sales generated, and ROI. Pair these with metrics such as view counts, average watch time, and click-through rates to identify where viewers might be dropping off. If you notice a pattern, tweak your opening hook to grab attention earlier. Don’t forget to assess SEO performance by checking if your targeted keywords are ranking higher and tracking changes in pageviews or bounce rates. Setting clear goals and KPIs before publishing will help you focus on what truly matters.
Test Different Versions
Experimentation is key. Create a few variations of your video, each with different hooks, calls-to-action (CTAs), and tones. For example, one version might dive straight into solving a common problem, while another teases the solution to spark curiosity. Try different CTA styles too - like spoken prompts (“Visit our site today”), text overlays, or dedicated end screens with your logo and URL. Once you identify which version resonates most with viewers, use that insight to refine your future videos.
Use Feedback to Improve
Pay attention to viewer comments to uncover what’s working and what’s not. Feedback can highlight impactful moments, such as memorable quotes or key brand mentions, that you can repurpose in future content. Transcribing interviews can also make it easier to spot standout soundbites. If viewers repeatedly ask similar questions, consider addressing those directly in your next case study. Combining your audience’s qualitative feedback with analytics will sharpen your storytelling and help you drive even better results.
Conclusion
Video case studies are one of the most effective tools you can use to connect with your audience. They bring a human touch to your brand, help overcome skepticism, and provide the kind of social proof that turns casual browsers into loyal customers. Here’s a key takeaway: viewers remember 95% of a message when it’s presented in a video format, compared to just 10% when they read the same information. That’s a game-changer for your marketing strategy.
The best part? You don’t need a Hollywood budget or a professional film crew to make it happen. A smartphone, real customer experiences, and a clear narrative structure - problem, solution, and results - are all you need. Keep the spotlight on your customer as the hero of the story, back up their success with concrete data, and wrap it up with a strong call-to-action.
Once your video is ready, make sure it’s seen where it counts. Use tools like UWidget to seamlessly embed your video on product pages and landing pages throughout your Shopify store. With 53% of shoppers researching before making a purchase, having video testimonials available at those key decision-making moments can mean the difference between closing a sale or losing a customer.
Start small. Pick one satisfied customer, film a short interview, and test it on a high-traffic product page. Monitor the results, gather feedback, and refine your approach as you go. Considering that 89% of people say watching a video has convinced them to make a purchase, even a single well-executed case study can lead to tangible results. This step-by-step approach gives you everything you need to create video content that builds trust, boosts sales, and keeps customers coming back.
FAQs
How do I pick the best customer story for a video case study?
To create a compelling video case study, start by selecting a customer story that showcases a genuine problem they faced and how your product or service solved it. Aim for stories with clear, measurable outcomes - like boosted sales, streamlined processes, or better user satisfaction - since these details make your case study more convincing and impactful.
Make sure the story speaks directly to your audience’s needs and interests. Including real experiences, direct customer quotes, and data-driven results can help make the narrative relatable and engaging. Focus on customers from industries or scenarios that your viewers can identify with to inspire them and clearly demonstrate the value your product brings.
What should I include in a script for a video case study?
A well-crafted video case study script should tell a real customer success story, clearly demonstrating how your product or service addressed their challenges. To make it impactful, include a strong introduction that grabs attention, highlight the key results or benefits achieved, and wrap up with a clear call-to-action that guides viewers on what to do next. Keep the tone relatable and engaging to connect with your audience on a personal level.
How can I tailor my video case study for different platforms?
To make your video case study stand out across different platforms, tailor the content to fit the unique style and audience of each one. For social media, focus on creating short, eye-catching clips that quickly deliver key points. On YouTube, you can go for longer, more detailed videos that tell a story and include a clear call-to-action (CTA) to guide viewers.
Don't forget to match each platform's technical specs - things like aspect ratio, video length, and resolution are crucial. Adding subtitles or captions is also a smart move, especially since many mobile users watch videos without sound. And if you're running an online store, consider using tools like Shopify apps to embed your videos, ensuring they get the visibility they deserve.